


Product: Jelly Lens filters
Available at: Kawaii Store
Price: RM15.90 each
Available at: Kawaii Store
Price: RM15.90 each
If you went loco for the LOMO camera in our last tech product review, you'll be jolly for jelly for this one! ;D All puns intended, Jelly Lens filters are affordable and fun, they can be used with all LOMO cameras and with most cellphones and compact cameras. Plus, don't forget that they make great gifts! :D What are they for: they give your photo "effects" worthy of Photoshop awards!

Note: They don't come with the labels but in individual packages. I made the labels myself :P
How much? Available where?
- Each Jelly Lens is only RM15.90.
- There are 12 different types of Jelly Lens available at Kawaii Store.
What do I use the Jelly Lens with?
- Any LOMO camera
- Most handphones (check your lens size with Kawaii Store)
- Most compact cameras (check your lens size with Kawaii Store)


How's the packaging and quality?
- Each Jelly Lens is individually packaged.
- It comes attached with protective lens cap and handphone strap (everything detachable).
- The quality is pretty good - and won't usually spoil when dropped.
- It weighs very little - feels weightless - so you can carry a bunch of these lenses around with you, no problem!
- The "jelly" part of the Jelly Lens - which sticks the lens to your camera - is easy to stick on and peel off :) If it loses its adhesiveness after a while, gently clean it with soap water.


How to use the Jelly Lens?
- Take off the protective lens cap and stick on the jelly part to your camera :)
- Adjust so that your camera lens and the jelly lens align - then snap away!


How to organise your Jelly Lens?
- Having excitedly gotten all 12 of the different Jelly Lens filters - for reviewing purposes mainly! :P - all the packaging made my drawer a little bit cluttered.
- But what if you remove the packaging and forget which lens is which, right? (They all look around the same)
- So what I did was, I used my RM10 label-maker and made little shorthand labels for each lens - and stuck it on the lens cap.


But do you really need all 12 Jelly Lens filters?
- Well, it's fun to have the complete set! :D
- But if you're looking for a couple of gifts for a friend, or just want some bonus lenses for your cellphone/LOMO camera, I'd recommend buying at least 3 Jelly Lens :) At RM15.90 each, it would be around RM50 including delivery to your doorstep - not a bad deal at all! :D
- Allow me to help, with sample photos and short opinions about each of the 12 lenses! :D
- You can also *click here* to visit another website with really good photo illustrations.
- All photos below were taken on my cellphone, unless stated otherwise.
- No photo example of Polarized Jelly Lens because I couldn't get the effect to show, sorry! :( Please click HERE for another website's photo sample.
- On the left is the "before" photo, without the lens - on the right is "after" (with the lens).
Type 1: Close Up


Highly recommended! Very, very useful.
Most handphone and LOMO cameras cannot focus so clearly on an object,
but this close-up Jelly Lens really works like magic :D
Type 2: Wide Angle or "Fish Eye"


Highly recommended! My personal favourite :D
The "fish eye" effect is really fun, whether taking pictures of your pets or friends! :)
Click HERE for some awesome examples.
Type 3: Starburst


The dark corners are because I used this lens on my LOMO camera -
don't you just love the tunnel effect of this? :D Saves you Photoshop work! ;)
Type 4: 6 Image Mirage


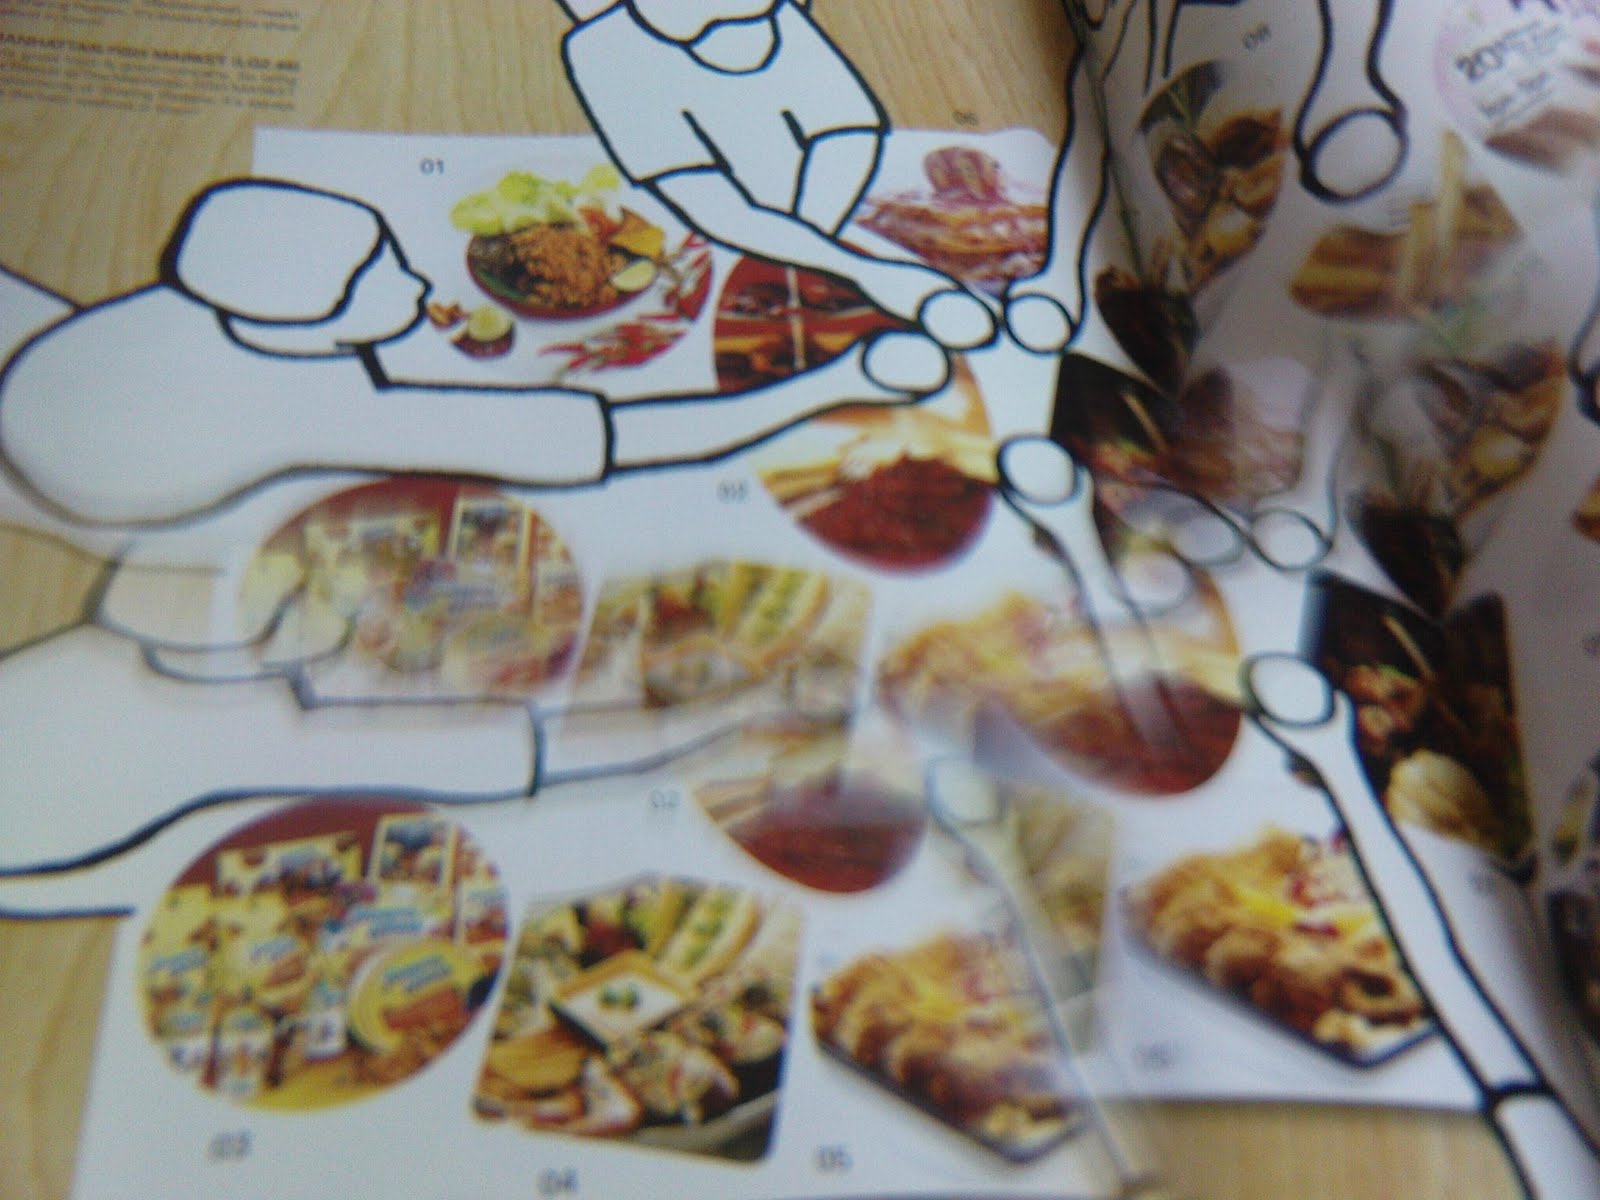
I think this is great for amplifying crowds or pretty flowers :)
Sorry I couldn't take those photo examples instead,
this magazine was the closest thing to me :P
Type 5: 3 Image Mirage


A milder version of the "6 Image Mirage" Jelly Lens.
Same function, just that this one overlaps the object 3 times instead of 6 :D
I'd recommend going for one of them :) I personally prefer 3 instead of 6.
Type 6: Vignette


Now here's a handy one for dressing up an otherwise boring photo! :D
Especially if the light is coming in on one side, the vignetting effect will be so beautiful!
Type 7: Stretch


Don't worry if you're having a bloated day,
because you can just use the "Stretch" lens to "stretch" yourself long! :D
This lens is totally value-for-money because you can stretch it "Wide" or "Narrow".
Type 8: Spark


I love this! The subtle sparkling effect reminds me so much of Edward Cullen.
Cue the dreamy sigh and glittering fictitious vampires, please!
Note: The dark corners are because I used this lens on my LOMO camera.
Type 9: Soft Lens


This one is an especially romantic lens, makes every picture look like a "soap opera" one.
Definitely a must try! :D
Type 10: Star & Antique


This one is so bubblegum retro! :D I couldn't get the "star" shape to really appear
because my handphone camera isn't clear enough,
but I'm sure you get the idea of what each lens will look like -
use them separately or stack them up! :D
Type 11: Star & Antique


Another two-for-one deal! :D The heart-shape is just so cute, right?
Images with dark corners were taken on my LOMO camera :)
I love how the lens just dips the whole picture into eclectic hues.
Images with dark corners were taken on my LOMO camera :)
I love how the lens just dips the whole picture into eclectic hues.
Excited to get your hands on some Jelly Lens? :D
Click HERE to visit Kawaii Store!
Click HERE to visit Kawaii Store!
Happy Shopping!
Your Shopping Kaki :)
Your Shopping Kaki :)


.jpg)


.jpg)


.jpg)


-500x500.JPG)
.jpeg)


.jpg)


.jpg)


.jpg)


.JPG)


.JPG)


.jpg)


.jpg)


.JPG)


.JPG)


.JPG)


.jpg)


.jpg)


.JPG)


.jpg)


+2.JPG)


No comments:
Post a Comment